In this article, I would like to discuss the most important tool in the masons’ bag, the masons’ trowel. The one difference that separates the masons’ trowel from most other tools is that you just do not pick up a trowel and start spreading the mortar on the wall as you would use a shovel to pick up sand and place the sand in a mortar mixer. No! It is a skill that you must learn and practice how to use. Just as if would have to learn how to play the piano or hit a golf ball straight.
Have you ever watch someone try to spread mortar who has never used a trowel or has little experience in the use of a trowel? The mortar usually falls off the blade of the trowel onto the ground and if they manage to get the mortar on the unit, they end up smearing the face of the unit.
What is even more fun is watching them try to butter the brick or block. the mortar usually falls off the ends of the units and if they manage to get the mortar to stick, they are lucky if they do not end up smearing the face of the units which they are trying to apply to the mortar to.
Therefore, it is imperative that one desiring to become a brick mason master the masonry trowel to become a skilled craftsperson.
Trowels come in many different sizes and shapes and serve different functions and use. Some of the trowel types are, the common mason trowels used for brick, block, and stone, buttering trowels used for refractories, pointing trowels, margin trowels, slickers used to point, clean, and fill voids in the mortar joints, and cement trowels used for the finishing of concrete.
But for this article, we are going to discuss the common mason’s trowel used for laying brick, block, and stone since this is probably one of the firsts tools a beginning mason will purchase. And since a high-quality trowel can last for a lifetime one needs to take a close look at the design of the mason’s trowel and how it is made.
A mason’s trowel consists of a one-piece carbon alloy steel unit forged and tempered into a blade, shank, and tang. They also make stainless steel trowels at an additional cost. I do not recommend blades that are welded or riveted to the shank for the blade can easily split or snap from the shank. The blade looks like a double triangle shape with a shank and the handle attached to the tang shown in figure 1.
The front of the blade is called the toe and is longer and thinner than the heel of the blade which attaches to the shank at the rear of the blade. The blade varies in length from 9” to 13” long, with a width varying 4” to 5 ½” at the wide part of the heel and large pattern trowel the heels can be 6 ½ wid. The thickness of the blade can vary from 60 thousand wide at the heel to 35 thousand at the toe. The thickness of the blade affects the flex of the blade and the weight of the trowel. The flex is needed so the blade will not snap or break and it reduces stress on the mason’s wrist when spreading mortar. A good blade will have a nice ring to it which when tapped will last for a few seconds.
Generally, there are three types of trowels the London Shaped Pattern with a narrow heel, the London shaped pattern with a wide heel, and the Philadelphia pattern which are shown below in figure 1. With the exception of the second trowel from the left which is a Philadelphia pattern all the other trowels shown in figure 1 are of the London pattern and are of various shapes and lengths with the trowel on the far right being a wide London pattern.
The handles shown in figure 2 are attached to the tang which comes off the shank and varies in length between 5” to 6” long. You can choose handles made of wood, composite material, hard rubber or plastic. You can also put a rubber cap on the end of the handle shown in Figure 4
The handle usually has a ferrule at the front of the tang, the ferrule is a metal ring or band that surrounds the handle and protects the handle from splitting and reinforces the handle.
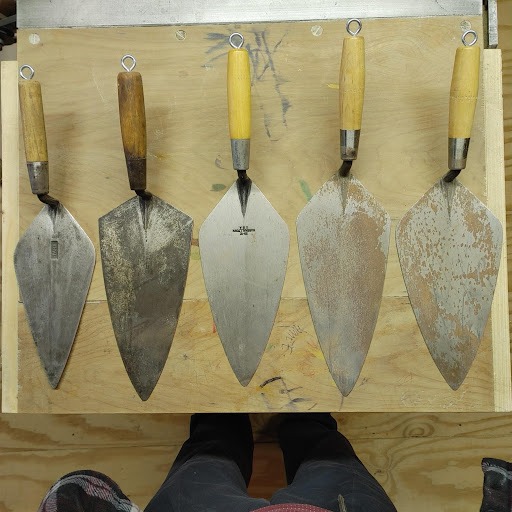
Figure 1: London and Philadelphia Trowels
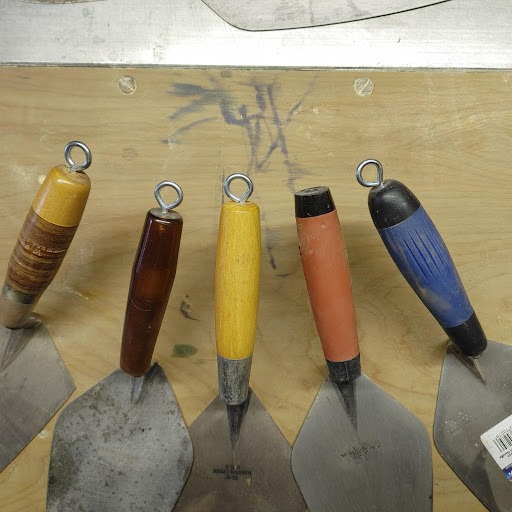
Figure 2: Types of Handles